|
|
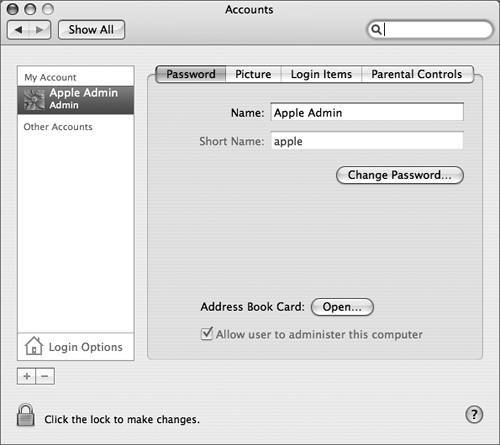
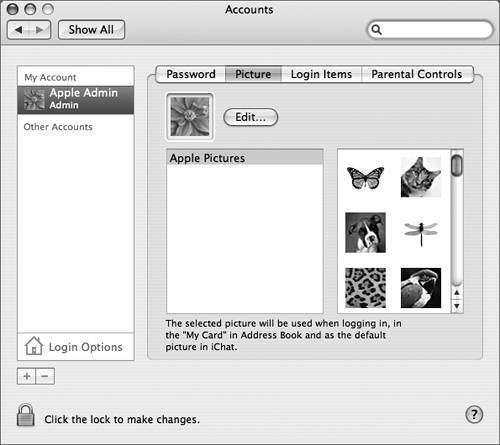
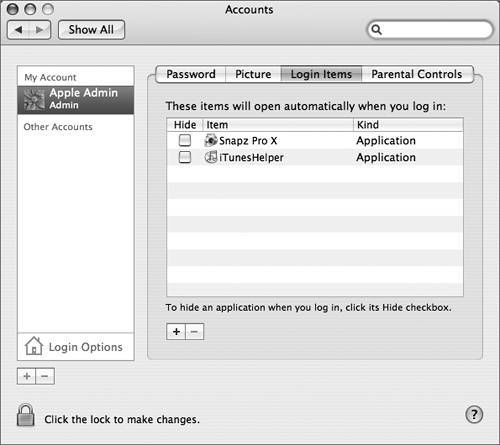
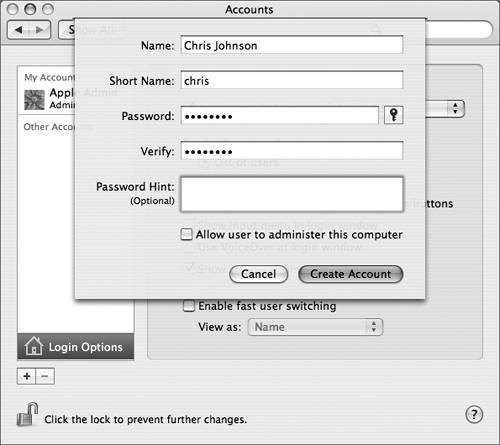
Creating and Editing User AccountsBoth administrator and standard users use Accounts preferences to manage user accounts. Although standard users can change their own account information, such as the login password, only administrator users can add or delete user accounts. Throughout this lesson, we assume that you are initially logged in as an administrator using an account named Apple Admin. If you prefer to continue using your existing account, that's fine, as long as it's an administrator account. Whenever the Apple Admin account is discussed in the book, substitute your administrator account instead. To create a new account, click the Add User (+) button. You then provide a long name, a short name, a password, and an optional password hint for the user. Accounts preferences is divided into four panes: NOTE Login Items is only available when you are configuring your own account, and Parental Controls is only available when you're editing standard accounts.
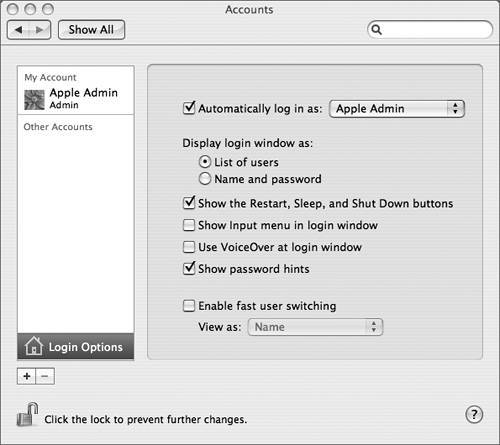
To apply your changes, switch to another pane, add a new user, or quit System Preferences. Setting Login OptionsThe Login Options pane in Accounts preferences is used to set options that affect how users log in as well as what they can do once they are logged in. To access the Login Options pane, select a user in the list at the left, then click Login Options at the bottom left.
If you are an administrator user, you can configure the computer to log in as a particular user every time it starts up or restarts. Select the "Automatically log in as" checkbox, and choose a user from the corresponding pop-up menu. You will be prompted for that account's password (if any). The next time the computer boots, Mac OS X will automatically log into that account. This option is best for computers with only one user account in a secure environment. You can configure the login window to display a list of user accounts with a login picture for each one or a prompt for the user name and password. The latter is the best choice for computers with several user accounts, and it also provides an extra measure of security because users must know a valid name and password to log in. If you have selected Network Startup in Startup Disk preferences, you can enter a local user account in the login window, or click Other and enter a network user name and password. You can also choose whether or not to show the Restart, Sleep, and Shut Down buttons. This security feature can keep a user from restarting in an insecure mode, short of using the reset or power buttons on the computer itself. This security feature is useful in managed environments such as kiosk-type installations, where you want to prevent a user from restarting the computer with a modifier key pressed. New in Mac OS X 10.4 are the options for showing the Input menu in the login window (necessary for proper input of passwords if users of the computer use different keyboards or language mappings), using VoiceOver at the login window (good for visually-impaired users), as well as whether to show password hints in the login window (recommended only in environments where security is not a priority). Finally, you can enable fast user switching (discussed later in this lesson). This feature lets multiple users share a computer without quitting applications and logging out. For the purposes of the following exercises, make sure fast user switching is enabled. Creating a Standard User AccountThis exercise guides you through the process of creating a standard user account:
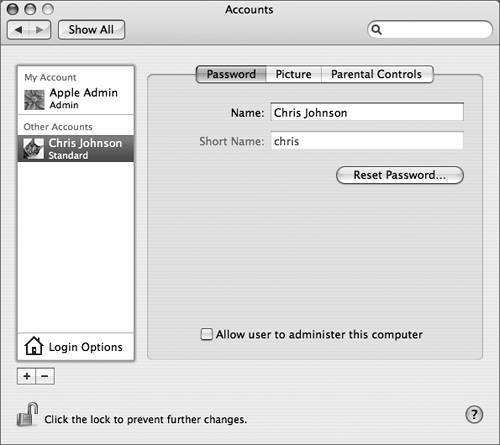
Test the New User AccountLog in using Chris Johnson's user account to verify that the user account was created correctly.
Switching Between UsersMac OS X 10.3 introduced a new feature, fast user switching, which lets multiple users share a computer without quitting applications and logging out. When one user logs in to his or her own account, other accounts remain active in the background with applications running and documents still open. Although the UNIX-based security model in Mac OS X helps keep data and applications secure, enabling fast user switching can introduce some potential security risks. For example, an encrypted disk image currently opened under one account would be potentially accessible from another account if both accounts are currently logged in with fast user switching. For this reason, you should not enable fast user switching on a computer where you do not know and trust all of the users (such as in a computer lab or a kiosk). When you activate fast user switching in the Login Options pane of Accounts preferences, a new menu appears on the right side of the menu bar. You can use this menu to switch between accounts. If you switch to an active user account (an account that is logged in), you'll see the account in the same state in which it was last left, with any applications running. This feature enables you to keep each account's user environment distinct and intact without wasting time.

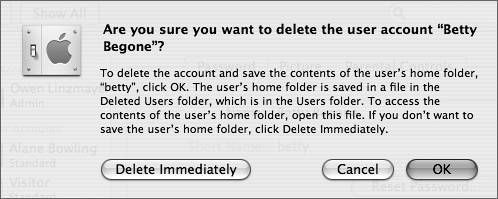
When using fast user switching, keep in mind that you might encounter resource conflicts. Many peripherals cannot be shared among multiple users on the same computer simultaneously. For example, if a user opens a scanner application and then switches out, a second user logging in may not be able to access the scanner. In some cases, applications that control peripherals will release control of the device when a user switches out. Some applications have issues when two or more people attempt to use the application at the same time. Mac OS X includes a list of versions of applications that are known to have issues when opened by more than one user. When a second user attempts to open the application, the system will warn the user that the application is already in use and cannot be opened. If you encounter an application that has problems being opened by multiple switched users, contact the application's developera more recent version may have fixed the problem. MORE INFO Refer to Knowledge Base document 25619, "Mac OS X 10.3, 10.4: Some applications only work in one account at a time." You can also experience conflicts in accessing documents. A user with the right permissions can open the same document that a previous user was editing, and can make changes to it, even if the first user left the document open. This can result in conflicts. Therefore, you should coordinate work on shared documents with other users of the system to avoid problems. Also, only one account at a time can use the Classic environment. If one account has a Classic application open, other users on that Mac OS X computer will not be able to run Classic applications until the first user quits the running Classic application and stops the Classic environment. NOTE If fast user switching is turned on, an administrator user cannot select or edit the account of any user that is currently logged in (the account name appears dimmed in Accounts preferences). Deleting User AccountsAs an administrator user, you can use Accounts preferences to delete any user account. However, you cannot remove all the administrator users because there must be at least one. To delete an account, select it, then click the Delete User (minus sign) button. The system will prompt you to put the contents of the user's home folder in a disk image (.dmg) file in the /Users/Deleted Users folder or to delete the home folder contents immediately.
If you click OK, the user's home folder will be moved into a disk image file in /Users/Deleted Users. If the files need to be transferred to another user account, an administrator user can move the disk image to that user's home folder. The user can then mount the disk image and retrieve the needed files. (Disk images are covered in Lesson 4, "File Systems.") NOTE If you click Delete Immediately, the user's home folder will be deleted and cannot be recovered. It is not put in the Trash, so this command should be used with caution. TIP When deleting a user that has FileVault configured, be sure that you first turn off FileVault for the user and then delete the user account. Deleting a User AccountThe following steps walk you through deleting a user account:
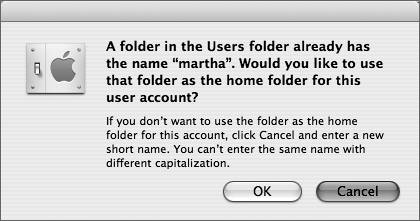
Restoring a Deleted User's FilesThe contents of the martha home folder have been stored in the martha.dmg disk image. (Disk images are covered in Lesson 4, "File Systems.") The following steps show you how to open the disk image and restore its contents:
|

|