|
|
Following Search PathsMac OS X puts resources such as fonts, frameworks, and preference data in various places. When Mac OS X needs those resources, it searches known locations in a specific order until it locates the resource. This is called the search path. Understanding the system search path is invaluable when troubleshooting system problems. The order in which Mac OS X searches for resources is
NOTE The search order above is comprehensive, but the Network and Classic paths are skipped if not available, as is the case in many circumstances.
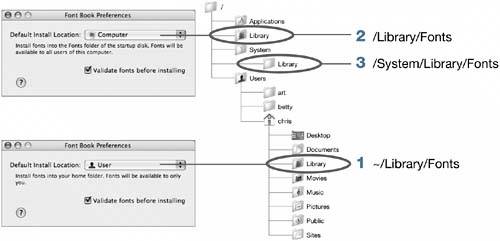
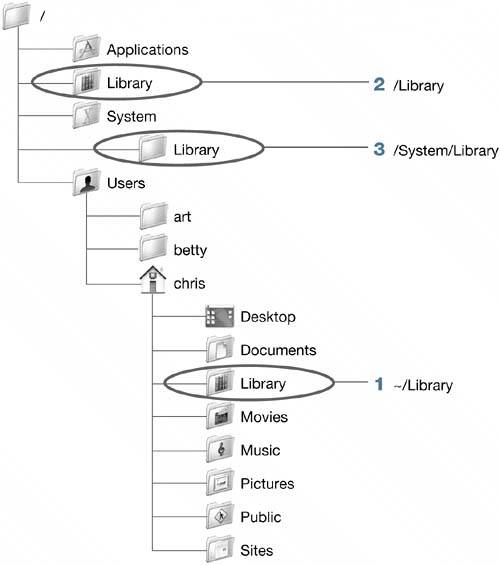
A good example of how search paths work involves fonts, which can reside in many locations. If you have multiple fonts of the same name installed, Mac OS X will load the first one it finds in the search path, depending upon the application requesting the resource. This order also applies to preferences and other resources in the Library folders. MORE INFO Refer to Knowledge Base document 106417, "Mac OS X: Font Locations and Their Purposes." Using Font Book to Understand Search PathsFor an example of resource paths, look at how Mac OS X uses fonts and how Font Book makes it easy for you to install fonts in public or private locations. Anyone can use the Finder to drag fonts into ~/Library/Fonts and make those fonts available to their user account, but fonts installed in that location are not available to other users on the computer. This may be exactly how you intend for those fonts to be installed: you might want to install licensed fonts for only one specific user. However, most fonts are licensed for a computer system, so you might want to install them in a location that is accessible to all users. An administrator user can install fonts in all of the system search path locations, but the /System/Library/Fonts folder is reserved for system fonts, so most of the time you will place fonts in /Library/Fonts or ~/Library/Fonts. Font Book makes it simple to install fonts in these central locations, so it's an effective tool for installing new fonts or troubleshooting font problems.
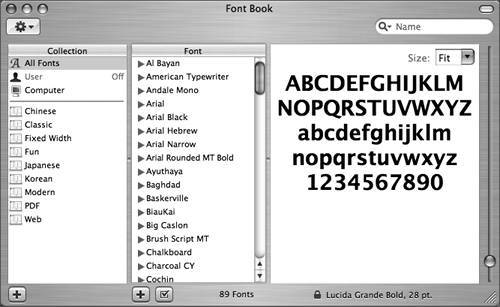
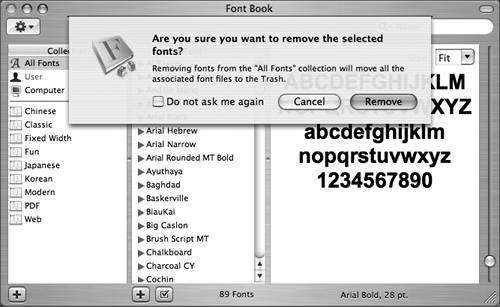
When Font Book reads your fonts, it queries all locations in the search path for valid resources of that type. If you encounter problems with a corrupt or damaged font, you can track back through the search path to identify the problem font. First, remove all fonts from ~/Library/Fonts, because that is the first location in the search path. If that does not resolve the problem, remove all fonts from /Library/Fonts. When you find the font store with the corrupt font, perform split-half searches to identify the problem font. You will learn about split-half searches in Lesson 14, "Troubleshooting." Removing a FontYou can use the Font Book utility to watch what happens when you move a font to the Trash. Adding a Font to Be Used by One User OnlyYou can use Font Book to install a font in your own Fonts folder.
Confirming That the Font Is Unavailable to Other UsersIf you log in as a different user, you don't have access to the fonts in user Apple Admin's Fonts folder.
|

|