|
|
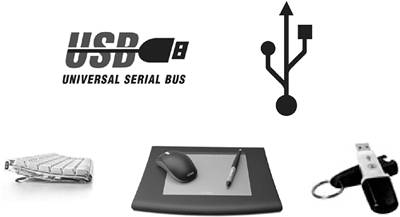
Plug-and-Play BusesThe two most commonly used plug-and-play buses for connecting peripheral devices to Macintosh computers are Universal Serial Bus (USB) and FireWire. Bluetooth is less common, but is gaining popularity. Plug-and-play buses allow you to connect, use, and disconnect devices while the device and the computer are powered on (hot-swapping), without the need to install special drivers or software for the devices to function. USB 1.1/2.0Universal Serial Bus (USB) is a plug-and-play interface for external add-on devices such as audio players, joysticks, keyboards, phones, scanners, and printers. You can connect USB devices directly to your computer or to other USB devices. For example, you can connect your USB mouse to your USB keyboard, which is then connected to your computer. You can also purchase USB hubs that allow you connect several USB devices to a single port on your computer.
USB 1.0/1.1 is the original version of the USB specification, still in use in many environments where maximum data transfer is not needed. Its maximum speed is 12 Mbit/s. The most recent USB version, USB 2.0, supports data transfer speeds of up to 480 Mbit/s, and is better suited for high-speed peripherals, such as storage devices and digital cameras. USB 2.0 devices can be plugged into a USB 1.1 port, but the device will operate at the slower bus speed. Also, USB 1.1 devices can be plugged into a USB 2.0 bus, but that will force all devices on the bus to operate at the slower speed. USB devices operate at three speeds. High-speed devices are designed for a data rate of 480 Mbit/s. Full-speed devices are designed for a data rate of 12 Mbit/s. Low-speed devices are designed for a data rate of 1.5 Mbit/s. High-speed and low-speed devices can both operate at their rated speed as long as the bus version is the same. Whenever possible, segregate USB devices by bus version. While USB ports provide power, the maximum power is very low (5 volts and .5 amps). While a low-power device, such as a mouse or keyboard, can be plugged into any USB port, a device that requires more power, such as a scanner, needs to be plugged into a powered port directly on the computer or on a powered USB hub. A self-powered USB device requires its own separate power supply. USB Error MessagesMost USB issues occur because a device is not properly powered or the correct driver software is not installed. There are four categories of USB error messages:
Troubleshooting USB IssuesTo troubleshoot USB issues, try the following:
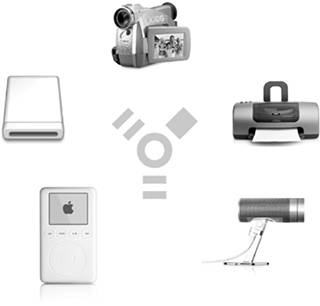
FireWire 400/800All current Macintosh computers have one or more FireWire 400 (IEEE 1394a) ports that transfer data at up to 400 Mbit/s. Some also have a FireWire 800 (IEEE 1394b) port that transfers data at up to 800 Mbit/s.
FireWire ports can provide bus power to FireWire devices (more power than USB; up to 30 volts and 1.5 amps). This is enough power to operate webcams, hard drives, or other devices; if your device can run on bus power, it does not need a separate AC adapter. FireWire devices have 4-pin, 6-pin, or 9-pin connectors. The 4-pin connectors do not provide bus power, but are popular on digital video cameras due to their compact size. On Macintosh computers, FireWire 400 ports have 6-pin connectors, and FireWire 800 ports have 9-pin connectors. You must use a FireWire cable that has the correct connector for your computer on one end, and the correct connector for the device on the other end. So if you have a device with a 4-pin connector and you want to plug it into your computer's FireWire 400 port (which accepts a 6-pin connector), you need a 4-pin to 6-pin cable. MORE INFO Visit http://developer.apple.com/devicedrivers/firewire/index.html or refer to Knowledge Base document 30520, "About FireWire 400 Technology." Starting in Target Disk ModeMost Mac OS X computers that have built-in FireWire have the capability to start in Target Disk Mode (TDM). Instead of booting the operating system, the computer (target) in disk mode acts as a hard drive that can be used by the host Macintosh with a FireWire connection. Essentially, this gives the host computer full access to the master internal hard drive of the target computer. NOTE Blue and White G3 computers do not support Target Disk Mode. Target Disk Mode is useful whether or not the computer can boot. You may opt to use TDM on a fully-functioning computer as an alternative to file sharing over a network if you have a large amount of data to transfer between computers. You can also use Target Disk Mode to migrate user accounts and home folders from one computer to another using the Migration Assistant during setup. You can even install software on a computer in TDM (for example, to get around Mac OS X 10.4's requirement for a DVD drive). Target Disk Mode is especially useful when a computer is unable to boot. You can use TDM to try to fix the problem with Disk Utility or third-party tools running on another computer. If that fails, you may still be able to copy or recover files from the nonbooting computer before erasing. Target Disk Mode can be a big security risk. There are multiple ways to use TDM to access a system without knowing the system's password. If someone has physical access to a system, he or she can access files on the system. One method to lock out TDM is to use the Open Firmware Password utility (which you can download from Apple) and give the hardware itself a password. To experiment with Target Disk Mode, you need two Macintosh computers with FireWire ports and a single FireWire cable. If you don't have access to the necessary hardware, you can still follow along with these instructions: MORE INFO Refer to Knowledge Base document 58583, "How to Use FireWire Target Disk Mode." Troubleshooting FireWire IssuesTo troubleshoot FireWire issues, try the following:
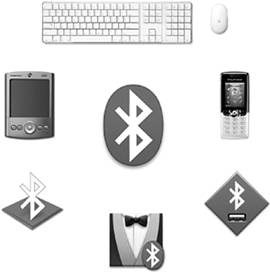
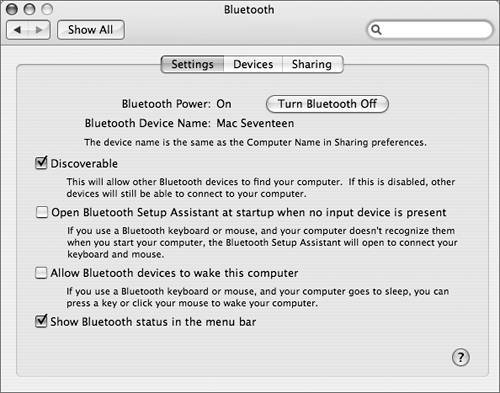
BluetoothBluetooth is a short-range wireless connection protocol used by desktop and portable computers, personal digital assistants, mobile phones, printers, scanners, digital cameras, and even some home appliances. It uses a globally available frequency band (2.4 GHz) for worldwide compatibility. Because Bluetooth uses a radio frequency to transmit data, Bluetooth devices communicate with any devices in range, even those that are not in line of sight. Although Bluetooth uses the same frequency as AirPort, they can both be enabled at the same time.
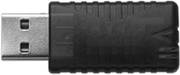
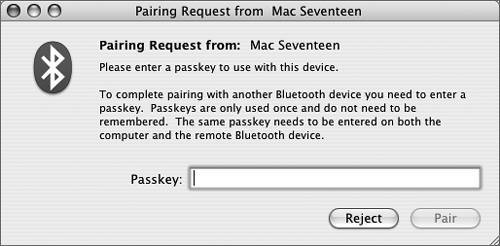
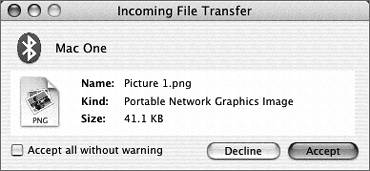
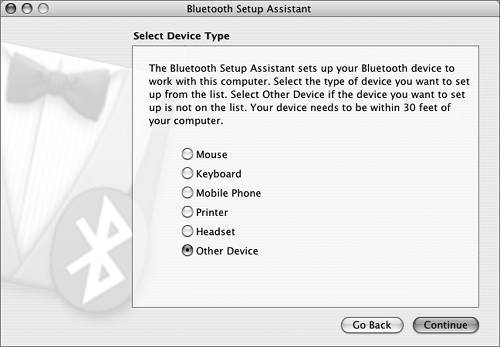
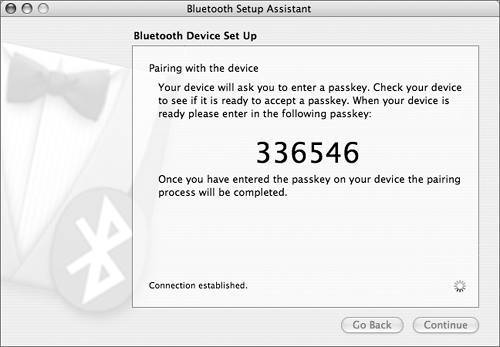
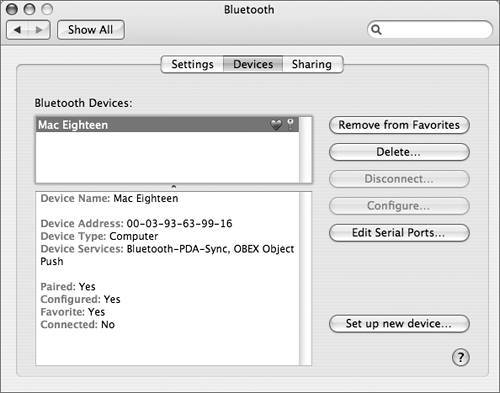
With Bluetooth, you can link your Palm OS-based handheld device, Bluetoothenabled mobile phone, and other peripherals to your Bluetoothequipped computer within a 30-foot range. Once linked, you can synchronize data, such as contacts and schedules, between your Macintosh and Bluetoothenabled mobile phones and PDAs, or even use your Bluetoothenabled mobile phone as a wireless mobile modem. While Bluetooth is not intended as a replacement for AirPort, it can be used for simple computer-to-computer communication. Mac OS X includes the Bluetooth File Exchange application (/Applications/Utilities) to transfer files between two Bluetoothenabled computers. To use Bluetooth, you must either have a computer with Bluetooth preinstalled or install a Bluetooth adapter, such as the D-Link DWB-120M Bluetooth USB adapter. You can use Bluetooth preferences to pair up with a device configured to be discoverable and set a passkey to authenticate connections with the device. Bluetooth preferences presents a list of all Bluetooth devices within range that are configured to be discoverable. Once you select the Bluetooth device in the list and click the Pair button, you're connected. Configuring Bluetooth PreferencesTo experiment with Bluetooth devices, you need two Macintosh computers, both with built-in Bluetooth or with Bluetooth adapters. If you don't have access to the necessary hardware, you can still follow along with these instructions. Before you can use Bluetooth to connect your computer to another Bluetooth device, you must perform some configuration, including setting a unique name for your computer:
Exchanging Files Using BluetoothTo use the Bluetooth File Exchange application to exchange files between Bluetoothenabled computers, follow these steps: Pairing Two Devices Using BluetoothWhen you want two devices to communicate automatically, they must be paired so they can identify and authenticate each other. Normally you would pair your computer with a Bluetooth device such as a phone or PDA; however, this exercise has you pair two computers. The task is very similar to pairing with a phone or PDA.
|


|