|
|
Sharing FilesWhen you enable one of the file sharing services in Sharing preferences, anyone who knows the user name and password of a local account can log in over the network and access files and folders on your computer. Exactly which files and folders they can access is determined by the file sharing service used and the existing permissions. File permissions visible in the Info window (or Terminal) not only protect your files and folders from unauthorized access by local users, they also restrict access by remote users. For example, if you've enabled Personal File Sharing in Sharing preferences (explained in the next section), remote Mac clients can talk to your server using Apple Filing Protocol. Using AFP, standard users can mount the home folders of other users, but they have full access only to the files and folders in their own home folders. Administrators can mount their own home folder or the entire volume because they may need to make changes outside their own home folders, such as installing new applications or deleting preferences files. However, that doesn't mean administrators can access all the folders in all users' home folders. The default permissions allow access to only the Public and Sites folders, whether you're authenticated as a standard user or as an administrator. NOTE Mac OS X Server can configure arbitrary share points, but Mac OS X is more limited. When you create a user account, Mac OS X automatically configures folder permissions in the home folder to allow only certain types of access.
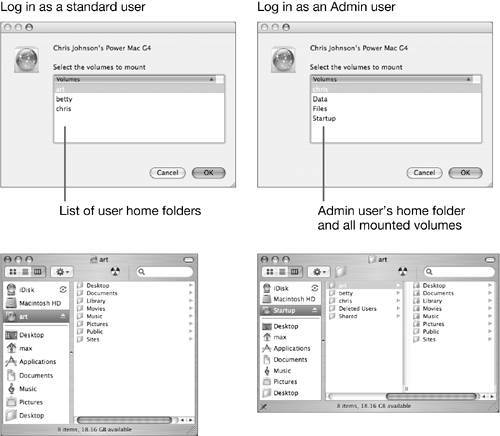
The Public and Drop Box folders are useful for sharing files with other users. The permissions for the Public and Sites folders in each user's home folder allow Read Only access to Group and Others. This allows users to view and open the folder contents, but not to change the contents. Within each Public folder is a Drop Box folder with the permissions for Group and Others set to Write Only. This allows users to copy files into the Drop Box, but not to view the files in the folder. NOTE Items on the root level of your home folder are visible to those who connect to your computereven if those users don't have permission to open them. If you have documents or folders with sensitive names, store them in ~/Documents.

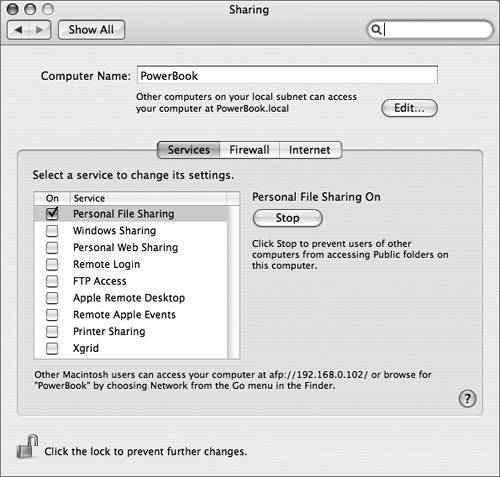
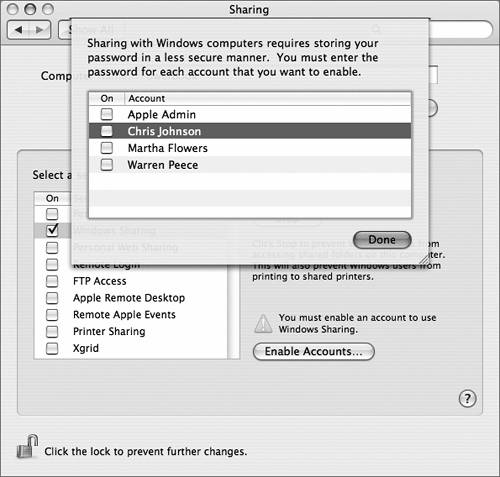
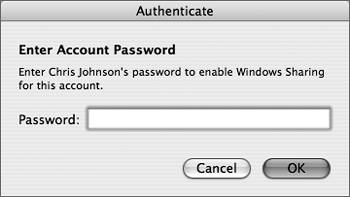
Sharing Files with Mac Clients Using AFPIn this exercise, you will enable Personal File Sharing on your server to allow users to connect to your computer from other Macintosh computers using the AFP protocol. Connecting to AFP ServicesIn this exercise, you use your Mac OS X client to connect to a server over AFP using a variety of methods. NOTE Mac OS X 10.4 supports AFP sharing using TCP/IP only. Mac OS 9 users won't be able to access Mac OS X 10.4 computers using AFP unless they are configured for TCP/IP networking. The handoff is seamless to the end user: If users discover Mac OS X 10.4 file servers via AppleTalk, AFP will use TCP/IP for the connection without notification, and no special configuration is required for the handoff. Sharing Files with Windows Clients Using SMBSMB/CIFS is a versatile protocol. It is used primarily in Windows for file sharing and printing, and is commonly provided in UNIX distributions in the form of the open source Samba server. To allow Windows and UNIX users (including Linux) to connect to your Mac OS X computer and print to shared printers, enable the Windows Sharing service in the Sharing pane of System preferences. Of course, Mac OS X users can also connect using SMB, too. However, if you need to share files with only Mac OS clients, use AFP instead since SMB is somewhat less secure. In this exercise, you will enable Windows Sharing on your server to allow users to connect to your computer using the SMB protocol. We will not discuss the printing capabilities of Windows Sharing.
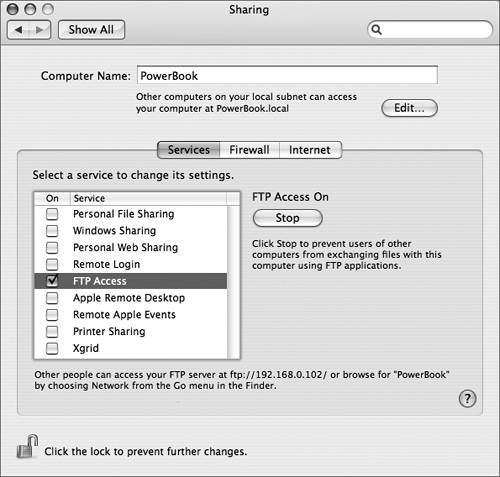
NOTE Windows Sharing is not as secure as Personal File Sharing. If you do not need to use Windows Sharing, do not turn it on. If you need to use it only temporarily, turn it off when not in use, but first turn off all the enabled accounts; otherwise, the passwords are still stored insecurely. Connecting to SMB ServicesThe example SMB address at the bottom of the Sharing preferences window always shows the short name of the current user, whether or not that account has been enabled for Windows Sharing. To connect properly via SMB, you must substitute the short name of an enabled account. Windows users connect using a back slash (\\192.168.0.102\chris). Macintosh users connect using a forward slash (smb://192.168.0.102/chris). Furthermore, because Mac OS X uses the SMB/CIFS (Samba) standard for Windows Sharing, Mac clients can also use cifs://192.168.0.102/chris. Mac OS X users need not enter a user name in the Connect to Server dialog. For example, if a Mac user enters the following in the Connect to Server dialog smb://192.168.0.102/ he or she can then authenticate using the user name and password of the home folder to which he or she wants to connect. Sharing Files Using FTPEnabling FTP Access in the Services pane of Sharing preferences allows users to exchange files with your server using FTP client applications that are available for practically every operating system. When you enable FTP Access, note the address given to your computer at the bottom of the window. It should be ftp:// followed by the IP address, DNS name, or local hostname of your server, optionally followed by a forward slash, such as ftp://192.168.0.102/ Remote clients need to know the user name and password of a local account to connect via FTP. Some operating systems allow you to set up anonymous FTP access, so that users who do not have accounts on your computer can log in, but this is inherently not secure. If you want to provide anonymous FTP access, the feature is available on Mac OS X Server, but it is not part of the default FTP setup on Mac OS X.
When a Macintosh client logs in to an FTP server using the Finder, his or her home folder is accessible, but regardless of the actual permissions for items, the user has Read Only access. If you want access to all files and folders on the server with their proper permissions respected, you must log in using a third-party FTP client. Keep in mind that regardless of how you log in using FTP, items that are normally hidden by the Finder are visible, and information exchanged between the client and the server is not encrypted. |
|